Head Lice in Kids: How to Check, Treat, and Prevent It
Sarah Mitchell
Sarah Mitchell is a Registered Pediatric Nurse and a mother of three who has spent over a decade helping families navigate the beautiful, chaotic early years of childhood. She combines evidence-based medical knowledge with real-world parenting experience to offer practical, compassionate advice. At Awesome Parent, Sarah's mission is to help exhausted parents find solutions, trust their instincts, and finally get some sleep.
If you just got the “there’s lice going around” message from school, take a breath. Head lice are extremely common, and they are not a sign your child or your home is dirty. In clinic, I saw lice in every kind of family and every kind of hair. The good news is that lice are annoying, not dangerous, and you can absolutely handle this.
This guide walks you through how to tell lice from dandruff, one of the most reliable ways to check at home (wet combing), how to use over-the-counter treatments correctly, what to clean at home, and how to prevent it from coming back.
What head lice look like (and what they do not)
Head lice are tiny insects that live on the scalp and feed on small amounts of blood. They lay eggs (nits) that stick to hair shafts. They spread mainly through direct head-to-head contact. They do not fly, and they do not jump.
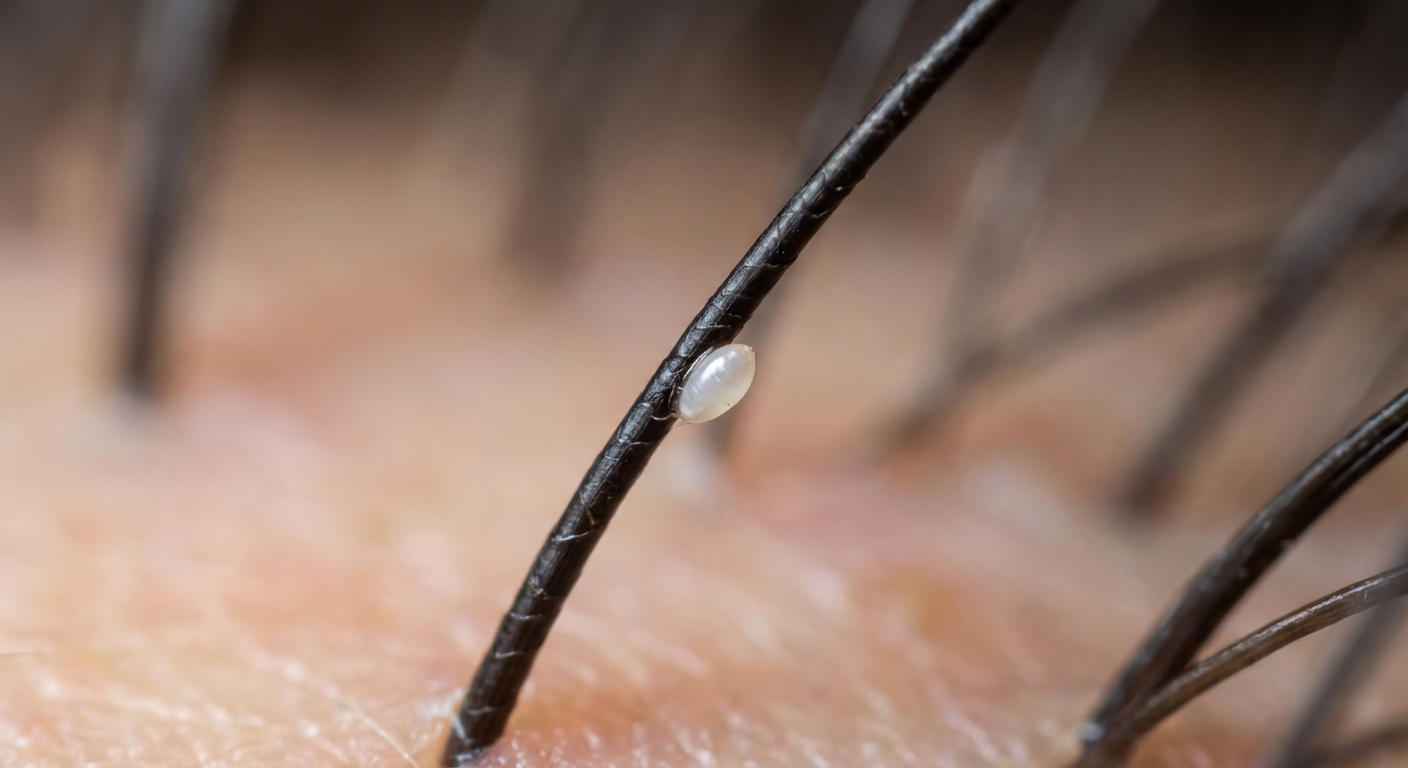
Nits (eggs)
- Where: Glued to the hair shaft, usually close to the scalp, especially behind the ears and at the nape of the neck.
- What they look like: Tiny oval specks. They can look white, tan, or yellowish.
- Key detail: Nits are hard to slide along the hair because they are cemented on. If it flicks off easily, it is usually dandruff or lint.
- Helpful rule of thumb: Nits that are very close to the scalp (often within about 1/4 inch) are more likely to be viable. Farther out can be old or empty casings, depending on hair growth and timing.
Nymphs (baby lice)
- Where: On the scalp and hair.
- What they look like: Very small, fast-moving, and often hard to spot. They mature in about 7 to 10 days (sometimes closer to 2 weeks).
Adult lice
- Size: About the size of a sesame seed.
- Color: Tan to grayish-white. They can look darker in darker hair.
- Movement: They crawl quickly and avoid light, which is why you rarely see them just by “looking.”
Lice vs dandruff: the quick reality check
This is the part that trips up even very attentive parents. A lot of things look like “white specks.” Here is how to tell what you are actually seeing.
- Dandruff: Flaky, irregular shapes. Usually slides off the hair easily. Often you will see more on the scalp and shoulders.
- Hair product residue: White bits that flake or smear if you pinch them between fingers.
- Lint: Random bits, not consistently close to the scalp, and flicks away.
- Nits: Small, oval, stuck in place on one side of the hair shaft, most often close to the scalp.
If you are still unsure, do not guess. Use the wet-combing method below. It is one of the most reliable at-home checks when done carefully.
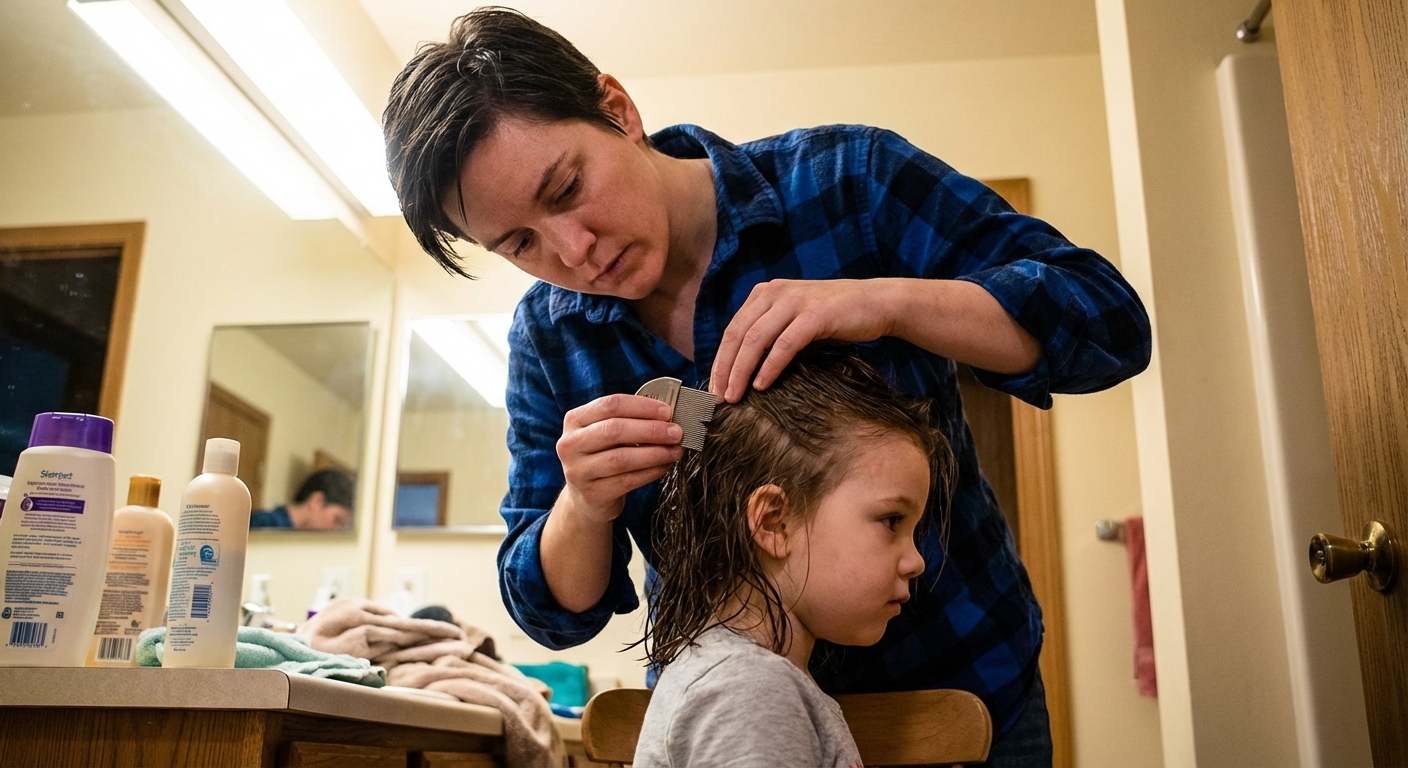
How to check for lice (wet-combing method)
If I could pick one method for families, it would be wet combing with conditioner and a true lice comb. It slows the lice down and makes them easier to catch.
What you need
- A metal fine-tooth lice comb (plastic ones that come in kits are often too bendy)
- White conditioner (it helps create a light background so darker lice and nymphs are easier to spot)
- A spray bottle of water (optional)
- Bright light
- Paper towels or a white tissue
- Clips or hair ties for sectioning
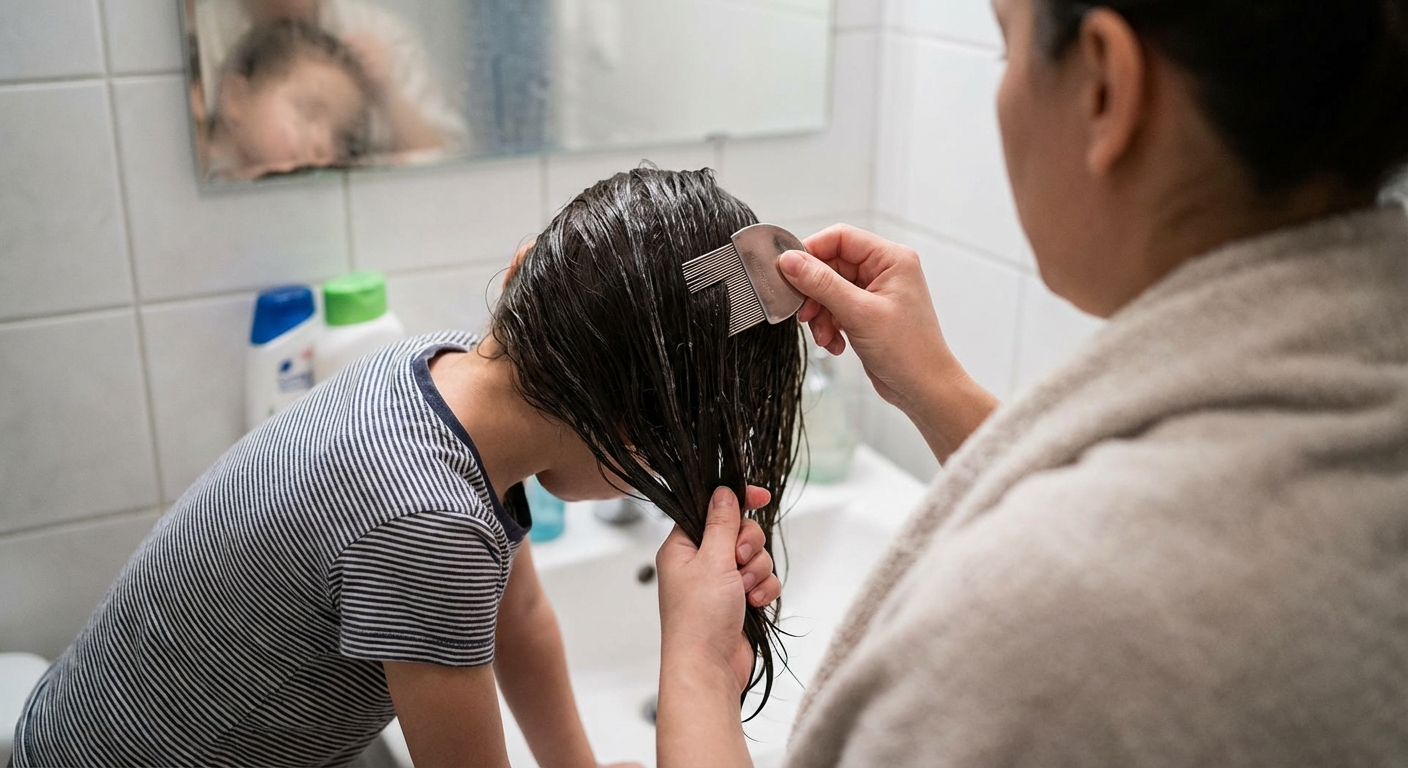
Step-by-step
- Wet the hair and apply a generous amount of conditioner from scalp to ends.
- Detangle first with a regular brush or wide-tooth comb if needed.
- Section the hair into manageable parts.
- Comb from scalp outward: Place the lice comb teeth right against the scalp and pull slowly all the way to the ends.
- Wipe the comb onto a paper towel after each pass. Look for live crawling lice (nymphs are tiny; adults are sesame-seed sized). You may also see nits or empty egg casings.
- Focus on hot spots: Behind ears, nape of neck, crown.
- Keep going until you have combed the entire head carefully. For thick hair, plan on 20 to 30 minutes.
When to say “yes, this is lice”
- Seeing a live crawling louse confirms an active infestation.
- Nits alone can be trickier. If they are very close to the scalp and you have symptoms like itching, treat or confirm with your pediatrician or school nurse if available.
Symptoms: what parents usually notice first
- Itchy scalp, especially behind the ears and at the neck (but many kids have no itching early on)
- Tickling feeling like something is moving in the hair
- Difficulty sleeping (lice are more active in the dark)
- Small red bumps or scratch marks on scalp or neck
Itching alone does not prove lice. Anxiety itches are real, too, especially once a school notice goes out.
Best OTC treatments (and how to use them correctly)
Over-the-counter products can work very well when they are used exactly as directed. Most treatment failures I saw were not because parents “did it wrong,” but because directions are easy to misread at 11 PM, or a second treatment was skipped.
Common OTC options
- Permethrin 1% lotion (often marketed as a creme rinse)
- Pyrethrins plus piperonyl butoxide (often marketed as a shampoo)
These products typically kill live lice, but may not kill all eggs. That is why repeat treatment is usually needed.
How to use OTC lice medicine the right way
- Read the box for age limits and safety instructions.
- Apply as directed to hair that is dry or towel-dried, depending on the product.
- Use enough product to fully coat the scalp and hair, especially behind ears and at the nape.
- Time it with a clock. Guessing tends to under-treat.
- Rinse as directed (some specify cool water and rinsing over a sink to limit skin exposure).
- Comb out with a lice comb after treatment to remove lice and nits.
- Repeat on schedule if the product directs it, often 7 to 10 days later. The goal is to kill newly hatched lice before they can lay more eggs.
Wet-combing helps even when you treat
Even with medication, combing makes a big difference. For many families, the best one-two punch is medication plus careful combing every few days for 2 weeks.
Avoid these common mistakes
- Do not retreat too soon (or too late). Follow the label timing, which is often 7 to 10 days.
- Do not mix multiple lice insecticides at once unless your clinician tells you to. More is not always better for kids’ skin.
- Do not assume conditioner is always okay before treatment. Some products specify not to use conditioner beforehand or right after. Follow the label.
- Do not rely on heat tools (flat irons, blow dryers) to “kill” lice. It is not reliable and it risks burns.
- Skip dangerous home remedies like kerosene or other flammable or toxic products.
If OTC treatment does not work
Resistance can happen in some communities. If you used the product exactly as directed and still see live lice after the full course, call your pediatrician. Prescription options may be appropriate.
What “prescription options” usually means
Your clinician may consider products like spinosad, ivermectin lotion, or malathion, depending on your child’s age and medical history and what is available in your area. Do not use a prescription product that was not prescribed for your child.
How to comb out nits without losing your mind
Nit removal is not always medically required for cure, but it can reduce confusion, lower the chance of missing a new infestation, and some schools still have “nit” policies even though many experts discourage them.
Tips that actually help
- Work in bright light, ideally near a window or under a strong lamp.
- Use conditioner to keep hair slippery.
- Go section by section with clips.
- Use your fingernails or a nit-removal tool to slide stubborn nits down the hair shaft.
- Set a timer and take breaks. Two 15-minute sessions can be more realistic than one long session.
Home cleaning checklist (what matters and what is overkill)
Here is the reassuring truth: lice survive best on a human head. Off the scalp, they usually do not live long (often about 24 to 48 hours), and they cannot lay viable eggs on couches, carpets, or stuffed animals the way many parents fear.
Your goal is simple: clean items that had direct head contact recently. You do not need to fumigate your house.
Do this in the last 48 hours
- Bedding and pillowcases: Wash in hot water if the fabric allows, then dry on high heat.
- Hats, hair accessories, scarves: Wash and dry with heat when possible.
- Coats or hoodie hoods that touch the head regularly: Wash if practical.
- Brushes and combs: Soak in hot water (at least 130°F if you can safely manage it) for 5 to 10 minutes, then scrub out debris.
Stuffed animals and items you cannot wash
- If it is a “must-sleep-with” stuffed animal, you can tumble dry on high heat if safe for the material.
- If you cannot heat it, you can seal it in a plastic bag for about 2 weeks to allow any lice to die off. This is usually more than enough, but it can also keep you from spiraling at bedtime.
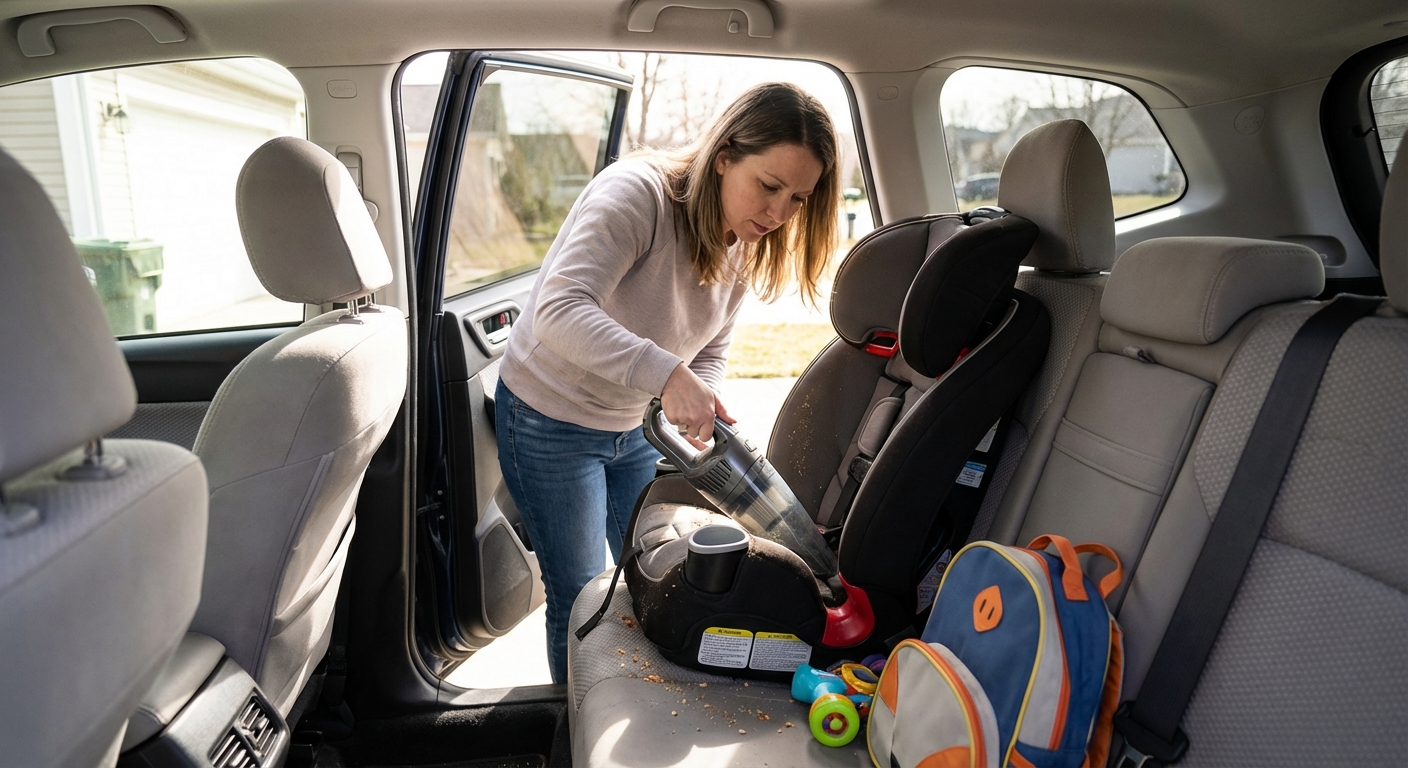
Car seats and soft furniture
- Vacuum the car seat, headrest area, couch cushions, and anywhere your child’s head rested.
- No sprays are needed, and many are not recommended around kids.
Skip these
- Whole-house deep cleaning of floors and carpets
- Insecticide foggers or household lice sprays
- Washing every piece of clothing in the home
Prevention tips for school and daycare
There is no perfect way to prevent lice, because kids are basically professional head-bumpers. But you can lower the odds.
- Teach “no head-to-head” when possible: During selfies, tablet time, and reading huddles.
- Pull long hair back in braids, buns, or ponytails on school days.
- Do not share hats, helmets, hairbrushes, scrunchies, or headphones.
- Give each child their own hook or cubby spot at home for hats and backpacks if you have multiple kids.
- Check weekly during outbreaks: a quick wet-comb check on Sunday evening can catch it early.
Some families ask about preventive lice shampoos or essential oils. I would be cautious. Many are not well-studied, and “natural” does not automatically mean safe for kids’ skin or airways, especially for children with asthma or sensitive skin.
Household plan: who to check and when
- Check everyone the same day you find lice, especially siblings, close playmates, and anyone who shares a bed.
- Treat only people with live lice found on careful examination.
- If more than one person needs treatment, it is usually easiest to treat on the same day and follow the same repeat schedule.
Common myths that make lice scarier than it is
- Myth: Lice jump or fly. Truth: They crawl. Spread is mainly head-to-head contact.
- Myth: Lice means poor hygiene. Truth: Lice like clean hair just fine. Hygiene is not the issue.
- Myth: You must throw away stuffed animals and bedding. Truth: Wash and dry items with head contact. Tossing is rarely necessary.
- Myth: If you see nits, the child is contagious. Truth: Nits can be old or nonviable. Live lice is the clearest sign of active infestation.
- Myth: Shaving the head is the only way. Truth: Effective treatments and combing work for most families without drastic steps.
When to call the pediatrician
Most lice can be handled at home, but you should check in with your child’s clinician if:
- Your child is under the minimum age for OTC products on the label
- You have done OTC treatment correctly and still see live lice
- The scalp is very irritated, oozing, crusted, or looks infected from scratching
- Your child has a history of skin conditions or you are unsure what is safe to apply
- There are repeated infestations in your home and you need a coordinated plan
A simple 10-day plan (bookmark this)
- Day 1: Confirm with wet combing. Treat with an OTC product if live lice are found. Comb thoroughly. Wash and dry bedding and recently used hats. Vacuum car seat and couch head areas. Check close household contacts, especially bedmates.
- Days 2 to 6: Wet-comb every 2 to 3 days and remove any lice or nits you find.
- Day 7 to 10: Repeat treatment if the product directs it. Comb again.
- Days 11 to 14: Keep checking every few days. If you still see live lice, call your pediatrician for next steps.
If you only remember one thing: you do not need to burn your house down. You need a solid check, a correctly timed treatment plan, and a comb you can trust.
Quick FAQ
Do I need to treat everyone in the house?
Treat only people who have live lice found on examination. But do check everyone carefully, especially siblings and anyone who shares a bed.
Can my child go to school?
Policies vary. Many health organizations discourage “no-nit” exclusions because nits do not always mean active infestation. Follow your school’s guidance, start treatment promptly if lice are confirmed, and minimize head-to-head contact.
Will hair dye or a flat iron kill lice?
Not reliably, and using heat close to the scalp can burn kids quickly. Stick with proven treatments and combing.